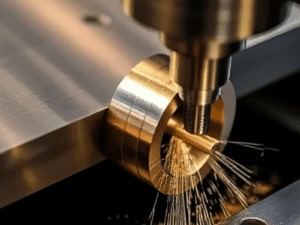
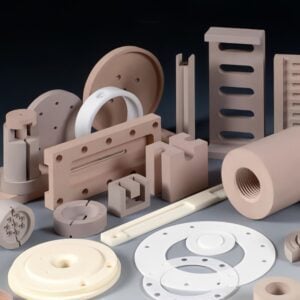
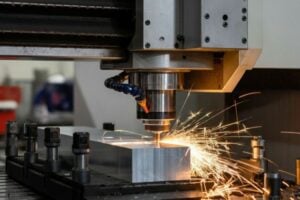
CNC machining is increasingly important for manufacturing metal parts. This article explains the terminology, technical requirements, inspection rules, and handling/storage of cutting and special processing. Emphasize the importance of certain documents for the application of CNC machining standards, and attach specific versions and modification orders.
Range
- This standard specifies the terms and definitions of cutting, technical requirements, inspection rules, and handling and storage.
- This standard applies to the cutting and special machining in the machining shop of the company.
- This standard does not apply to sheet metal processing.
Normative reference documents
The following documents are essential for the application of this document. For dated references, the date-only version applies to this document. For undated references, the latest version (including all amendment orders) applies to this document.


- GB/T 3-1997 Common thread finishing, shoulder distance, retracting slot and chamfer
- GB/T 145-2001 Center hole
- GB/T 197-2003 Common thread tolerance
- GB/T 1031-2009 Product Geometry Technical Specification (GPS) Surface structure profile method surface roughness parameters and their values
- GB/T 1182-2008 Product Geometry Technical specification (GPS) Geometric tolerances — marks for shape, direction, position and runout tolerances
- GB/T 1184-1996 Tolerance of shape and position No tolerance values are specified
- GB/T 1568-2008 key technical conditions
- GB/T 1804-2000 General tolerances The tolerances of linear and angular dimensions are not noted
- GB/T 2828.1-2003 Enumeration-sampling inspection procedure — Part 1: Batch inspection sampling plan retrieved by AQL
- GB/T 4249-2009 Product Geometry Technical Specification (GPS) tolerance principles
- GB/T 5796.4-2005 Trapezoidal threads – Part 4: Tolerances
- Q/JS Jxx.xx-2012 Nonconforming product control procedures
- Q/JS Jxx.xx-2012 Technical Requirements for unloading Semi-finished sheet metal parts of cabinets
Terms and Definitions
The terms and definitions given in GB/T 1182-2008 and the following terms and definitions apply to this document.
1 . Cutting
A process in which excess layers of material are removed from a blank or workpiece by cutting tools (including cutters, abrasives, and abrasives) so that the workpiece is of specified geometry, size, and surface quality. Including turning, milling, planing, grinding, broaching, drilling, reaming, reaming, grinding, honing, polishing, super finishing and the automatic technology composed of them, numerical control technology, group technology, modular machine tools, assembly lines, automatic lines.
2. Special processing
Special processing, also known as “non-traditional processing” or “modern processing method”, generally refers to the processing method of removing or adding materials with energy such as electricity, heat energy, light energy, electrochemical energy, chemical energy, sound energy and special mechanical energy, so as to achieve the removal, deformation, performance change or plating of materials. The company’s existing special processing methods are line cutting processing, laser processing, water cutting processing.
3. Tolerance zone
A region bounded by one or more ideal geometric lines or surfaces whose magnitude is expressed by linear tolerance values.
Technical Requirements
1 . Processing Principles
a) “Benchmark first” principle
The reference surface is first machined to ensure reliable positioning for subsequent processes. For example, the first process of shaft parts is usually to mill the end face and drill the center hole, and then to the center hole positioning processing of other surfaces.
b) The principle of “face first, then hole”
When the parts have a large plane can be used as a positioning reference, always first the processing plane, and then the plane positioning processing hole, to ensure the accuracy of the position between the hole and the plane, so that the positioning is stable, convenient clamping, and can avoid rough surface drilling caused by deflection.
c) The principle of “first, then second”
Machining the main surface first (datum surface and working surface with high position accuracy requirements) and machining the secondary surface (such as keyway, screw hole, fastening hole, etc.). The secondary surface is generally after the primary surface has reached a certain precision before the final finishing.
d) The principle of “rough before fine”
For the parts with higher precision requirements, the processing accuracy is gradually improved by the order from rough to fine. This point for the rigid parts, especially can not be ignored.


General Requirements
1. Machining and machining of mechanical workpieces must follow product drawings, process regulations, and provisions of this standard.
2 . The machined surface of the mechanical workpiece shall not have corrosion, knock, scratch, or other defects that affect its performance, life, and appearance.
3 . Except for special requirements, the parts after processing shall not have sharp edges and burrs.
4 . After finishing, no mark shall be made on the working surface such as the mating surface, friction surface or positioning surface that will damage the surface quality.
5 . The parts after heat treatment shall not have annealing, burn or crack during finishing.
6. The processed parts must be protected from damage, corrosion, and deformation during handling and storage.
7. Chamfering not indicated on the drawing shall comply with the provisions of
Table 1 (mm)
| D(d/l) | ≤5 | >5~10 | >10~30 | >30~100 | >100~250 | >250~500 | >500~1000 |
|---|---|---|---|---|---|---|---|
| C | 0.2 | 0.5 | 1 | 2 | 3 | 4 | 6 |
Note: Non-cylindrical chamfer is selected by reference, where l is the smallest of the dimensions related to the chamfer.
8 . The chamfered dimensions not indicated on the drawing shall conform to the provisions of Table 2 if there is no inclination requirement.
Table 2 (mm)
| D-d | ≤4 | >4~12 | >12~30 | >12~80 | >80~140 | >140~200 | >200 |
|---|---|---|---|---|---|---|---|
| D(L) | 3~10 | >10~30 | >30~80 | >80~260 | >260~630 | >630~1000 | >1000 |
| R | 0.5 | 1 | 2 | 4 | 8 | 12 | 20 |
Note 1: D value is used for blind holes and outer face chamfering.
Note 2: Non-cylindrical chamfering is selected by reference, where L is the smallest of the dimensions related to the chamfering.
9 .If chamfer is not indicated on the drawing or surface roughness of excessively rounded corners, the larger Ra value in the two tables should be selected. If one side is not processed, the Rd value of the machined surface should be selected.
10 .Marks shall be made on the parts processed in pairs (such as the upper and lower bearing bush of sliding bearing and the upper and lower cover of the gearbox, etc.).
No dimensional tolerance specified
1. The value of the limit deviation of unnoted tolerance dimensions (excluding chamfer and chamfer radius) shall be calculated in the GB/T1804-2000-m class. The values are specified in Table 3.
Table 3 Limit deviation values of tolerance dimensions not specified (mm)
| Tolerance class | Basic length range | ||||||
|---|---|---|---|---|---|---|---|
| 0.5~3 | >3~6 | >6~30 | >30~120 | >120~400 | >400~1000 | >1000~2000 | |
| f | ±0.05 | ±0.05 | ±0.1 | ±0.15 | ±0.2 | ±0.3 | ±0.5 |
| m | ±0.1 | ±0.1 | ±0.2 | ±0.3 | ±0.5 | ±0.8 | ±1.2 |
| c | ±0.2 | ±0.3 | ±0.5 | ±0.8 | ±1.2 | ±2 | ±3 |
| v | ― | ±0.5 | ±1 | ±1.5 | ±2.5 | ±4 | ±6 |
2 .The limit deviation of chamfer size and chamfer radius is in the GB/T1804-2000-m class. The values are specified in Table 4.
Table 4 Limit deviation values of chamfer size and chamfer radius (mm)
| Tolerance class | Basic length range | |||
|---|---|---|---|---|
| 0.5~3 | >3~6 | >6~30 | >30 | |
| f | ±0.2 | ±0.5 | ±1 | ±2 |
| m | ||||
| c | ±0.4 | ±1 | ±2 | ±4 |
| v | ||||
3. The drilling depth of the blind hole and its allowable deviation are specified as follows:
- a) 0 ~ +3mm if the hole depth is less than 50mm;
- b) If the hole depth is greater than 50mm, 0 ~ +5mm.
4. Where the lowest point is countersunk, the limit deviation of the depth is 0 ~ +5mm.
5 .The limit deviation of unmarked dimensional tolerance of one side for machined surface and one side for non-machined surface shall comply with the following provisions:
- a) Castings, forgings, and welds shall be ± 70% of the limit deviation of the corresponding non-machined unmarked dimensional tolerance.
- b) The edge or wall thickness of castings and forgings is allowed to be thinned. When the wall thickness is less than 10mm, the thinning amount shall not be greater than 20% of the wall thickness; When the wall thickness is more than 10 mm, the thinning amount shall not be greater than 15% of the wall thickness.


No shape tolerance noted
1. Straightness and flatness
The tolerance values of straightness and flatness not marked on the drawing are calculated according to GB/T1184-1996-H, and the specific tolerance values are shown in Table 5.
| Tolerance class | Basic length range | |||||
|---|---|---|---|---|---|---|
| ≤10 | >10~30 | >30~100 | >100~300 | >300~1000 | >1000~3000 | |
| H | 0.02 | 0.05 | 0.1 | 0.2 | 0.3 | 0.4 |
2. Unmarked tolerance values of roundness and cylindricity
The unnoted tolerance values of roundness and cylindricity are required in GB/T1184-1996.
3. Position tolerance is not indicated
4. Parallelism
The unannotated tolerance value of parallelism is equal to the dimensional tolerance value given, or the corresponding tolerance value of the unannotated tolerance value of straightness and planeness is larger. The elder of the two elements should be used as the basis, or if the length of the two elements is equal, one element can be used as the basis.
Perpendicularity
The longer side of the two sides forming a right Angle is taken as the benchmark, while the shorter side is taken as the measured factor. If the length of the two sides is equal, either side can be taken as the benchmark, and the value is taken according to GB/T1184-1996-H class. The unnoted tolerance value of perpendicularity is shown in Table 6.
| Tolerance class | Basic length range | |||
|---|---|---|---|---|
| ≤100 | >100~300 | >300~1000 | >1000~3000 | |
| H | 0.2 | 0.3 | 0.4 | 0.5 |
1. Degree of symmetry
The longer side of the two elements should be taken as the benchmark, while the shorter side should be taken as the measured factor. If the length of the two elements is equal, either of the two elements should be taken as the benchmark, and the value should be taken according to GB/T1184-1996-H. The unnoted tolerance value of the symmetry degree is shown in Table 7.
Note: The unnoted tolerance value of symmetry is used when at least one of the two elements is the central plane, or when the axes of the two elements are perpendicular to each other.
Table7 mm
| Tolerance class | Basic length range | |||
|---|---|---|---|---|
| ≤100 | >100~300 | >300~1000 | >1000~3000 | |
| H | 0.5 | |||
| K | 0.6 | 0.8 | 1.0 | |
| L | 0.6 | 1.0 | 1.5 | 2.0 |
2. Coaxiality
Unnoted tolerance values for coaxiality are not specified.
In several limit cases, the unnoted tolerance value of coaxiality can be equal to the unnoted tolerance value of radial circle runout specified in Table 8. The longer side of the two elements should be taken as the benchmark. If the length of the two elements is equal, either of the two elements should be taken as the benchmark.
3. Round jump
For the unnoted tolerance value of round runout, the support surface given by the design or process should be taken as the reference, otherwise, the longer side of the two elements should be taken as the reference, if the length of the two elements is equal, either of the elements can be used as the reference. According to the value of GB/T1184-1996-H class, the unnoted tolerance values of circle runout are shown in Table 8. (mm)
| Tolerance class | Circular runout tolerance value |
|---|---|
| H | 0.1 |
| K | 0.2 |
| L | 0.5 |
4. Vertical elements and tilt elements are controlled by angular tolerance and unmarked tolerance values of straightness or flatness respectively.
5. The tolerance value of round runout and full runout shall not be greater than the combined value of the unnoted tolerance of the shape and position of the element.
6.If the limit deviation of any two screws and bolt hole center distance is not indicated on the drawing, it shall be specified in Table 9. (mm)
| Center distance of screw or bolt | 3~6 | >6~10 | >10~18 | >18~30 | >30~100 | >100~200 | >200 |
|---|---|---|---|---|---|---|---|
| Limit deviation of center distance between any two screws | ±0.12 | ±0.25 | ±0.30 | ±0.50 | ±0.75 | ±1.25 | ±1.50 |
| Limit deviation of center distance between any two bolts | ±0.25 | ±0.50 | ±0.75 | ±1.00 | ±1.50 | ±2.50 | ±3.00 |
Limit deviation of Angle without tolerance
The limit deviation value of Angle size is determined by the length of Angle short side, and the conical Angle is determined by the length of conical prime line. The limit deviation of the Angle dimension is in the GB/T1804-2000-m class. The limit deviation of Angle size is shown in Table 10.(mm)
| Tolerance class | Basic length range(mm) | ||||
|---|---|---|---|---|---|
| ≤10 | >10~50 | >50~120 | >120~400 | >400 | |
| f | ±1° | ±30′ | ±20′ | ±10′ | ±5′ |
| m | |||||
| c | ±1°30′ | ±1° | ±30′ | ±15′ | ±10′ |
| v | ±3° | ±2° | ±1° | ±30′ | ±20′ |
Thread
1. The surface of processed thread shall not have defects such as black skin, bump, random buckle and burr.
2. Machining accuracy and surface roughness of thread, if not indicated on the drawing, shall comply with the following provisions:
a) The precision of ordinary thread shall be 6H and 6g according to GB/T197-2003. The surface roughness of internal thread was 12.5µm; The surface roughness of the external thread is 6.3µm.
b) The precision of trapezoidal thread shall be in accordance with GB/T5796.4-2005. The surface roughness of internal thread was 6.3µm. Surface roughness of external thread is 3.2µm.
3. The coaxiality of the axis of the external thread to the rod part and the axis of the internal thread to the hole part shall not be greater than 1/2 of the dimensional tolerance of the large diameter of the external thread and the large diameter of the internal thread respectively.
4. Thread finishing, shoulder distance, retracting slot and chamfer shall be in accordance with GB/T 3-1997.
5. The perpendicularity of the axis of the tapping screw hole against the end face shall be specified in Table 11.(mm)
| Thread length | ≤10 | >10~16 | >16~25 | >25~40 | >40~63 | >63~100 | |
|---|---|---|---|---|---|---|---|
| Tolerance value | Hand against | 0.12 | 0.15 | 0.20 | 0.25 | 0.30 | 0.40 |
| Machine tapping | 0.08 | 0.10 | 0.12 | 0.15 | 0.20 | 0.25 | |
Keys and Keyways
1. Keys must comply with GB/T1568-2008.
2. When the ratio of key length to key width is not less than 8, the flatness of key working face in the direction of length shall comply with the following provisions:
- a) When the key width is less than or equal to 6mm, the tolerance level shall be 7;
- b) When the key width is ≥8 ~ 36mm, the tolerance level shall be 6;
- c) When the key width is not less than 40mm, the tolerance level shall be 5;
- d) See Table 12 for specific tolerance values.
Table12 (mm)
| Length of keys and keyways | ≤10 | >10~16 | >16~25 | >25~40 | >40~63 | >63~100 | >100~160 | >160~250 | ||
|---|---|---|---|---|---|---|---|---|---|---|
| Tolerance class | 5 | Tolerance value | 0.005 | 0.006 | 0.008 | 0.010 | 0.012 | 0.015 | 0.020 | 0.025 |
| 6 | 0.008 | 0.010 | 0.012 | 0.015 | 0.020 | 0.025 | 0.030 | 0.040 | ||
| 7 | 0.012 | 0.015 | 0.020 | 0.025 | 0.030 | 0.040 | 0.050 | 0.060 | ||
3 . The tolerance of parallelism of two working faces without injection of keyway shall be calculated according to tolerance level 7 in Table 12.
4. Symmetry of unmarked keyways shall be calculated according to level 9 of Table B4 in Appendix B of GB/T 1184-1996.
5. Center hole
6. For parts that are not indicated in the drawing and need the center hole during processing, the center hole can be retained after processing without affecting the use and appearance.
7. The center hole shall comply with GB/T 145-2001.
8. Surface roughness
Surface roughness not indicated in the drawing shall conform to GB/T 1031-2009.
Inspection Rules
1 Rejection
1. Unless otherwise stipulated, acceptance shall not be rejected according to practice when the form and position error of the element of a part exceeds the unstated tolerance value and the function of the part is not damaged.
2. Unless otherwise provided, parts outside general tolerances shall not normally be judged rejected if they do not meet the requirements that impair their function.
2. Inspection Requirements
2.1 The mechanical workpiece shall be inspected and accepted by the quality control Department according to the drawing, relevant technical documents and this standard. The parts can be transferred to the next procedure only after they are checked and qualified.
2.2 The parts produced in bulk or processed by labor must be inspected as the first part, and the geometric shape and dimensional accuracy of major parts shall be checked one by one.
2.3 The appearance of mechanical workpiece shall be inspected according to the requirements of Article 4.3.2 ~ 4.3.6.
2.4 Unmarked dimensional tolerances and angular tolerances of mechanical workpiece shall be inspected according to the requirements of Article 4.4 and 4.7.
2.5 The unnoted shape and position tolerances of the mechanical workpiece shall be inspected in accordance with the requirements of Article 4.5 and 4.6.
2.6 The appearance, dimensional accuracy, form and position tolerance and surface roughness of mechanical workpiece thread shall be inspected according to the requirements of Article 4.8.
2.7 Dimensional accuracy and form and position tolerance of keys and keyways shall be inspected according to the requirements of Article 4.9.
2.8 After the finished product of mechanical processing is checked and qualified, the inspection mark of quality control department shall be marked in the obvious position.5.2.9 Mechanical machining workpiece can only be stored after passing inspection.
3 .Sampling Rules
If the customer has clear requirements, sampling inspection shall be carried out according to the customer’s requirements; The customer does not have clear requirements for sampling inspection according to the level Ⅱ of GB/T2828.1-2003 (AQL=0.65).
4. Processing of inspection results
The qualified parts and semi-finished products shall be placed in the qualified products display area and marked with the qualified products station board; Nonconforming products shall be disposed of according to Nonconforming Products Control Procedure..


